 Matrix Hookshot


A Matrix bot for connecting to external services like GitHub, GitLab, JIRA, and more.
- Several services are supported out of the box.
- Webhooks let you connect all kinds of services, with the ability to write rich templates using JavaScript.
- No external database is required, instead using Matrix state as a persistent store.
- End-to-Bridge encryption allows bots to be used in encrypted Matrix rooms.
- Powerful widgets let you configure Hookshot from a room or the Element Extensions Store.
We richly support the following integrations:
Get started by reading the setup guide!
Documentation
Documentation can be found on GitHub Pages.
You can build the documentation yourself by typing:
# cargo install mdbook
mdbook build
sensible-browser book/index.html
Contact
We have a Matrix support room (#hookshot:half-shot.uk).
Getting set up
This page explains how to set up Hookshot for use with a Matrix homeserver.
Requirements
Hookshot is fairly light on resources, and can run in as low as 100 MB or so of memory. Hookshot memory requirements may increase depending on the traffic and the number of rooms bridged.
You must have administrative access to an existing homeserver in order to set up Hookshot, as Hookshot requires the homeserver to be configured with its appservice registration.
Local installation
This bridge requires at least Node 22 and Rust installed.
To install Node.JS, nvm is a good option.
To install Rust, rustup is the preferred solution to stay up to date.
To clone and install, run:
git clone https://github.com/matrix-org/matrix-hookshot.git
cd matrix-hookshot
pnpm install
pnpm build
Starting the bridge (after configuring it), is a matter of setting the NODE_ENV environment variable to production or development, depending if you want better performance or more verbose logging, and then running it:
NODE_ENV=production pnpm start
Installation via Docker
halfshot/matrix-hookshot, but this is no longer maintained. Please update to use the image below.
To get started quickly, you can use the Docker image ghcr.io/matrix-org/matrix-hookshot.
docker run \
    --name matrix-hookshot \
    -d \
    -p 9993:9993 \ # Homeserver port
    -p 9000:9000 \ # Webhook port
    -p 9002:9002 \ # Metrics port
    -v /etc/matrix-hookshot:/data \
    ghcr.io/matrix-org/matrix-hookshot:latest
Where /etc/matrix-hookshot would contain the configuration files config.yml and registration.yml. The passKey file should also be stored alongside these files. In your config, you should use the path /data/passkey.pem.
Installation via Helm
There's now a basic chart defined in helm/hookshot that can be used to deploy the Hookshot Docker container in a Kubernetes-native way.
More information on this method is available here
Configuration
Copy the config.sample.yml to a new file config.yml. The sample config is also hosted
here for your convenience.
You should read and fill this in as the bridge will not start without a complete config.
You may validate your config without starting the service by running pnpm validate-config.
For Docker you can run docker run --rm -v /absolute-path-to/config.yml:/config.yml ghcr.io/matrix-org/matrix-hookshot node config/Config.js /config.yml
Copy registration.sample.yml into registration.yml and fill in:
At a minimum, you will need to replace the as_token and hs_token and change the domain part of the namespaces. The sample config can be also found at our github repo for your convienence.
You will need to link the registration file to the homeserver. Consult your homeserver documentation on how to add appservices. Synapse documents the process here.
Homeserver Configuration
In addition to providing the registration file above, you also need to tell Hookshot how to reach the homeserver which is hosting it. For clarity, Hookshot expects to be able to connect to an existing homeserver which has the Hookshot registration file configured.
bridge:
  domain: example.com # The homeserver's server name.
  url: http://localhost:8008 # The URL where Hookshot can reach the client-server API.
  mediaUrl: https://example.com # Optional. The url where media hosted on the homeserver is reachable (this should be publically reachable from the internet)
  port: 9993 # The port where hookshot will listen for appservice requests.
  bindAddress: 127.0.0.1 # The address which Hookshot will bind to. Docker users should set this to `0.0.0.0`.
The port and bindAddress must not conflict with the other listeners in the bridge config. This listener should not be reachable
over the internet to users, as it's intended to be used by the homeserver exclusively. This service listens on /_matrix/app/.
Permissions
The bridge supports fine grained permission control over what services a user can access. By default, any user on the bridge's own homeserver has full permission to use it.
permissions:
  - actor: example.com
    services:
      - service: "*"
        level: admin
You must configure a set of "actors" with access to services. An actor can be:
- A MxID (also known as a User ID) e.g.
"@Half-Shot:half-shot.uk" - A homeserver domain e.g.
matrix.org - A roomId. This will allow any member of this room to complete actions. e.g.
"!TlZdPIYrhwNvXlBiEk:half-shot.uk" "*", to match all users.
MxIDs. room IDs and * must be wrapped in quotes.
Each permission set can have a service. The service field can be:
githubgitlabjirafeedfigmageneric(NOTE: This was incorrectly documented aswebhooks. Either will work, but please migrate togeneric. ).openprojectchallengehound*, for any service.
The level determines what permissions a user has access to on the named service(s). They are
additive, one level grants all previous levels in addition to previous levels.
The level can be:
commandsCan run commands within connected rooms, but NOT log in to the bridge.loginAll the above, and can also log in to supported networks (such as GitHub, GitLab). This is the minimum level required to invite the bridge to rooms.notificationsAll the above, and can also bridge their own notifications. Only supported on GitHub.manageConnectionsAll the above, and can create and delete connections (either via the provisioner, setup commands, or state events).adminAll permissions. This allows you to perform administrative tasks like deleting connections from all rooms.
If any of the permissions matches positively for a user, they are granted access. For example:
permissions:
  - actor: example.com
    services:
      - service: GitHub
        level: manageConnections
  - actor: "@badapple:example.com"
    services:
      - service: GitHub
        level: login
would grant @badapple:example.com the right to manageConnections for GitHub, even though they
were explicitly named for a lower permission.
Example
A typical setup might be.
permissions:
  # Allow all users to send commands to existing services
  - actor: "*"
    services:
      - service: "*"
        level: commands
  # Allow any user that is part of this space to manage github connections
  - actor: "!TlZdPIYrhwNvXlBiEk:half-shot.uk"
    services:
      - service: github
        level: manageConnections
  # Allow users on this domain to log in to jira and github.
  - actor: support.example.com
    services:
      - service: jira
        level: login
      - service: github
        level: commands
  # Allow users on this domain to enable notifications on any service.
  - actor: engineering.example.com
    services:
      - service: "*"
        level: notifications
  # Allow users on this domain to create connections.
  - actor: management.example.com
    services:
      - service: "*"
        level: manageConnections
  # Allow this specific user to do any action
  - actor: "@alice:example.com"
    services:
      - service: "*"
        level: admin
Listeners configuration
You will need to configure some listeners to make the bridge functional.
listeners:
  # (Optional) HTTP Listener configuration.
  # Bind resource endpoints to ports and addresses.
  # 'resources' may be any of webhooks, widgets, metrics, provisioning
  #
  - port: 9000
    bindAddress: 0.0.0.0
    # Optional, may specify a prefix for the listener to put all routes under.
    prefix: "/hookshot"
    resources:
      - webhooks
  - port: 9001
    bindAddress: 127.0.0.1
    resources:
      - metrics
      - provisioning
At a minimum, you should bind the webhooks resource to a port and address. You can have multiple resources on the same
port, or one on each. Each listener MUST listen on a unique port.
You will also need to make this port accessible to the internet so services like GitHub can reach the bridge. It is recommended to factor Hookshot into your load balancer configuration, but currently this process is left as an exercise to the user.
However, if you use Nginx, have a look at this example:
    location ~ ^/widgetapi(.*)$ {
        set $backend "127.0.0.1:9002";
        proxy_pass http://$backend/widgetapi$1$is_args$args;
    }
This will pass all requests at /widgetapi to Hookshot.
In terms of API endpoints:
- The
webhooksresource handles incoming webhooks for various services. Currently, these are:/githubfor GitHub/gitlabfor GitLab/jirafor JIRA/webhooksfor Generic Webhooks/openprojectfor OpenProject/figmafor Figma.
- The
metricsresource handles resources under/metrics. - The
provisioningresource handles resources under/v1/.... - The
widgetsresource handles resources under/widgetapi/v1.... This may only be bound to one listener at present.
Cache configuration
You can optionally enable a Redis-backed cache for Hookshot. This is generally a good thing to enable if you can afford to, as it will generally improve startup times. Some features such as resuming RSS/Atom feeds between restarts is also only possible with a external cache.
To enable, simply set:
cache:
  redisUri: "redis://redis-host:6379"
Messaging defaults
Hookshot allows you to configure global overrides for certain message features. This is useful if you have a configuration you'd like to apply every room.
messaging:
  allowUrlPreviews: true
Services configuration
You will need to configure some services. Each service has its own documentation file inside the setup subdirectory.
Logging
The bridge supports some basic logging options. The section is optional, and by default will log at an info level.
logging:
  # Level of information to report to the logs. Can be `debug`, `info`, `warn` or `error.
  level: info
  # Should the logs output in human-readable format or JSON. If you are using a third-party ingestion service like logstash, use this.
  json: false
  # Ignored if `json` is enabled. Should the logs print the levels in color. This will print extra characters around the logs which may not be suitable for some systems.
  colorize: true
  #  Ignored if `json` is enabled. The timestamp format to use in log lines. See https://github.com/taylorhakes/fecha#formatting-tokens for help on formatting tokens.
  timestampFormat: HH:mm:ss:SSS
JSON Logging
Enabling the json option will configure hookshot to output structured JSON logs. The schema looks like:
{
  // The level of the log.
  level: "WARN",
  // The log message.
  message: "Failed to connect to homeserver",
  // The module which emitted the log line.
  module: "Bridge",
  // The timestamp of the log line.
  timestamp: "11:45:02:198",
  // Optional error field, if the log includes an Error
  error: "connect ECONNREFUSED 127.0.0.1:8008",
  // Additional context, possibly including the error body.
  args: [
    {
      address: "127.0.0.1",
      code: "ECONNREFUSED",
      errno: -111,
      port: 8008,
      syscall: "connect",
    },
    "retrying in 5s",
  ],
}
Sample Configuration
Below is a sample bridge configuration file. The configuration file can be tweaked to change the behaviour of your bridge. A bridge of the server is required to apply any changes made to this file.
# This is an example configuration file

bridge:
  # Basic homeserver configuration
  domain: example.com
  url: http://localhost:8008
  mediaUrl: https://example.com
  port: 9993
  bindAddress: 127.0.0.1
logging:
  # Logging settings. You can have a severity debug,info,warn,error
  level: info
  colorize: true
  json: false
  timestampFormat: HH:mm:ss:SSS
passFile:
  # A passkey used to encrypt tokens stored inside the bridge.
  # Run openssl genpkey -out passkey.pem -outform PEM -algorithm RSA -pkeyopt rsa_keygen_bits:4096 to generate
  ./passkey.pem
listeners:
  # HTTP Listener configuration.
  # Bind resource endpoints to ports and addresses.
  # 'port' must be specified. Each listener must listen on a unique port.
  # 'bindAddress' will default to '127.0.0.1' if not specified, which may not be suited to Docker environments.
  # 'resources' may be any of webhooks, widgets, metrics
  - port: 9000
    bindAddress: 0.0.0.0
    resources:
      - webhooks
  - port: 9001
    bindAddress: 127.0.0.1
    resources:
      - metrics
  - port: 9002
    bindAddress: 0.0.0.0
    resources:
      - widgets

#cache:
#  # (Optional) Cache options for large scale deployments.
#  #    For encryption to work, this must be configured.
#  redisUri: redis://localhost:6379

#encryption:
#  # (Optional) Configuration for encryption support in the bridge.
#  # If omitted, encryption support will be disabled.
#  storagePath:
#    # Path to the directory used to store encryption files. These files must be persist between restarts of the service.
#    ./cryptostore

#permissions:
#  # (Optional) Permissions for using the bridge. See docs/setup.md#permissions for help
#  - actor: example.com
#    services:
#      - service: "*"
#        level: admin

#github:
#  # (Optional) Configure this to enable GitHub support
#  auth:
#    # Authentication for the GitHub App.
#    id: 123
#    privateKeyFile: github-key.pem
#  webhook:
#    # Webhook settings for the GitHub app.
#    secret: secrettoken
#  oauth:
#    # (Optional) Settings for allowing users to sign in via OAuth.
#    client_id: foo
#    client_secret: bar
#    redirect_uri: https://example.com/oauth/
#  defaultOptions:
#    # (Optional) Default options for GitHub connections.
#    showIssueRoomLink: false
#    hotlinkIssues:
#      prefix: "#"
#  userIdPrefix:
#    # (Optional) Prefix used when creating ghost users for GitHub accounts.
#    _github_

#gitlab:
#  # (Optional) Configure this to enable GitLab support
#  instances:
#    gitlab.com:
#      url: https://gitlab.com
#  webhook:
#    secret: secrettoken
#    publicUrl: https://example.com/hookshot/
#  userIdPrefix:
#    # (Optional) Prefix used when creating ghost users for GitLab accounts.
#    _gitlab_
#  commentDebounceMs:
#    # (Optional) Aggregate comments by waiting this many miliseconds before posting them to Matrix. Defaults to 5000 (5 seconds)
#    5000

#jira:
#  # (Optional) Configure this to enable Jira support. Only specify `url` if you are using a On Premise install (i.e. not atlassian.com)
#  webhook:
#    # Webhook settings for JIRA
#    secret: secrettoken
#  oauth:
#    # (Optional) OAuth settings for connecting users to JIRA. See documentation for more information
#    client_id: foo
#    client_secret: bar
#    redirect_uri: https://example.com/oauth/

#generic:
#  # (Optional) Support for generic webhook events.
#  #'allowJsTransformationFunctions' will allow users to write short transformation snippets in code, and thus is unsafe in untrusted environments

#  enabled: true
#  outbound: false
#  urlPrefix: https://example.com/webhook/
#  userIdPrefix: _webhooks_
#  allowJsTransformationFunctions: false
#  waitForComplete: false
#  enableHttpGet: false
#  sendExpiryNotice: false
#  requireExpiryTime: false
#  maxExpiryTime: 30d
#  includeHookBody: true
#  payloadSizeLimit:
#    # (Optional) How large may an incoming payload be. Specify in bytes or in a format like '1mb', '500kb', '10mb', etc.
#    1mb

#figma:
#  # (Optional) Configure this to enable Figma support
#  publicUrl: https://example.com/hookshot/
#  instances:
#    your-instance:
#      teamId: your-team-id
#      accessToken: your-personal-access-token
#      passcode: your-webhook-passcode

#feeds:
#  # (Optional) Configure this to enable RSS/Atom feed support
#  enabled: false
#  pollIntervalSeconds: 600
#  pollTimeoutSeconds: 30
#  pollConcurrency: 4

#openProject:
#  # (Optional) Configure OpenProject support
#  baseUrl: https://your-open-project.com
#  webhook:
#    secret: secrettoken
#  oauth:
#    clientId: foo
#    clientSecret: bar
#    redirectUri: https://example.com/oauth/

#bot:
#  # (Optional) Define profile information for the bot user
#  displayname: Hookshot Bot
#  avatar: mxc://half-shot.uk/2876e89ccade4cb615e210c458e2a7a6883fe17d

#serviceBots:
#  # (Optional) Define additional bot users for specific services
#  - localpart: feeds
#    displayname: Feeds
#    avatar: ./assets/feeds_avatar.png
#    prefix: "!feeds"
#    service: feeds

#widgets:
#  # (Optional) EXPERIMENTAL support for complimentary widgets
#  addToAdminRooms: false
#  publicUrl: https://example.com/widgetapi/v1/static/
#  roomSetupWidget:
#    addOnInvite: false
#  disallowedIpRanges:
#    - 127.0.0.0/8
#    - 10.0.0.0/8
#    - 172.16.0.0/12
#    - 192.168.0.0/16
#    - 100.64.0.0/10
#    - 192.0.0.0/24
#    - 169.254.0.0/16
#    - 192.88.99.0/24
#    - 198.18.0.0/15
#    - 192.0.2.0/24
#    - 198.51.100.0/24
#    - 203.0.113.0/24
#    - 224.0.0.0/4
#    - ::1/128
#    - fe80::/10
#    - fc00::/7
#    - 2001:db8::/32
#    - ff00::/8
#    - fec0::/10
#  branding:
#    widgetTitle: Hookshot Configuration

#metrics:
#  # (Optional) Prometheus metrics support
#  enabled: true

#sentry:
#  # (Optional) Configure Sentry error reporting
#  dsn: https://examplePublicKey@o0.ingest.sentry.io/0
#  environment: production

#connections:
#  # (Optional) Static connections that may be configured by an admin
#  - connectionType: uk.half-shot.matrix-hookshot.generic.hook
#    stateKey: any-unique-id
#    roomId: "!any-room-id:example.org"
#    state:
#      name: My static hook

#messaging:
#  # (Optional) Message defaults
#  allowUrlPreviews:
#    # (Optional) Allow clients to generate their own URL previews from Hookshot messages. On by default
#    true
Feeds
You can configure hookshot to bridge RSS/Atom feeds into Matrix.
Configuration
feeds:
  # (Optional) Configure this to enable RSS/Atom feed support
  #
  enabled: true
  pollIntervalSeconds: 600
pollIntervalSeconds specifies how often each feed will be checked for updates.
It may be checked less often if under exceptional load, but it will never be checked more often than every pollIntervalSeconds.
Each feed will only be checked once, regardless of the number of rooms to which it's bridged.
No entries will be bridged upon the “initial sync” -- all entries that exist at the moment of setup will be considered to be already seen.
Please note that Hookshot must be configured with Redis to retain seen entries between restarts. By default, Hookshot will run an "initial sync" on each startup and will not process any entries from feeds from before the first sync.
Usage
Adding new feeds
To add a feed to your room:
- Invite the bot user to the room.
- Make sure the bot able to send state events (usually the Moderator power level in clients)
- Say
!hookshot feed <URL>where<URL>links to an RSS/Atom feed you want to subscribe to.
Listing feeds
You can list all feeds that a room you're in is currently subscribed to with !hookshot feed list.
It requires no special permissions from the user issuing the command. Optionally you can format the list as json or
yaml with !hookshot feed list <format>.
Removing feeds
To remove a feed from a room, say !hookshot feed remove <URL>, with the URL specifying which feed you want to unsubscribe from.
Feed templates
You can optionally give a feed a specific template to use when sending a message into a room. A template may include any of the following tokens:
| Token | Description |
|---|---|
| $FEEDNAME | Either the label, title or url of the feed. |
| $FEEDURL | The URL of the feed. |
| $FEEDTITLE | The title of the feed. |
| $TITLE | The title of the feed entry. |
| $URL | The URL of the feed entry. |
| $LINK | The link of the feed entry. Formatted as [$TITLE]($URL). |
| $AUTHOR | The author of the feed entry. |
| $DATE | The publish date (pubDate) of the entry. |
| $SUMMARY | The summary of the entry. |
If not specified, the default template is New post in $FEEDNAME: $LINK.
The template can also be given as an argument when adding the feed to a room, e.g. !hookshot feed <URL> <LABEL> <TEMPLATE>. If the template contains spaces, it can be quoted using double quotes.
Figma
Setting up
To bridge Figma webhooks with Hookshot, you will need:
- A personal access token with admin access to the team you intend to bridge.
- A figma account that is on the professional tier, as the free tier does provide webhook access.
- Your team ID. You can get this by going to the team page on Figma, and looking for the ID in the url (e.g. 12345 in
https://www.figma.com/files/team/12345/...)
Configuration
You can now set some configuration in the bridge config.yml
figma:
  publicUrl: https://example.com/hookshot/
  instances:
    your-instance:
      teamId: your-team-id
      accessToken: your-personal-access-token
      passcode: your-webhook-passcode
your-instance should be a friendly name for your instance E.g. matrix-dot-org.
The publicUrl value must be the public path to /figma/webhook on the webhooks listener. E.g. if your load balancer points https://example.com/hookshot to the bridge's webhooks listener, you should use the path https://example.com/hookshot/figma/webhook.
The accessToken should be the personal access token for your account.
The passcode should be a randomly generated code which is used to authenticate requests from Figma.
The bridge will automatically set up a webhook on Figma for you upon startup, and will automatically reconfigure that webhook if the publicUrl or passcode changes.
Next steps
If you have followed these steps correctly, Figma should now be configured with hookshot 🥳.
To bridge a figma file into your room, you should:
- Invite the bot user to the room.
- Make sure the bot able to send state events (usually the Moderator power level in clients)
- Say
!hookshot figma file fileUrlwherefileUrlis the URL to the figma file e.ghttps://www.figma.com/files/project/12345/... - Figma comments will now be bridged into the room.
Setting up GitHub
GitHub App
This bridge requires a GitHub App. You will need to create one.
Webhook
/ as the public path for webhook delivery. This path is now deprecated and /github/webhook should be used wherever possible.
The Webhook URL should point to the public address of your hookshot instance, at the /github/webhook path.
You MUST also provide a secret, which should match the github.webhook.secret value in your config.
Permissions
You will need to enable the following permissions:
- Repository
- Actions (
read) - Contents (
read) - Discussions (
read & write) - Issues (
read & write) - Metadata
- Projects (
read & write) - Pull requests (
read & write)
- Actions (
- Organisation
- Team Discussions (
read & write)
- Team Discussions (
Hookshot handles the following webhook event types:
- Commit comment
- Create
- Delete
- Discussion
- Discussion comment
- Issue comment
- Issues
- Project
- Project card
- Project column
- Pull request
- Pull request review
- Pull request review comment
- Push
- Release
- Repository
- Workflow run
You can disable any of these to disable the events being handled in Hookshot.
Once you have set up your app, you can move onto configuring the bridge:
Bridge Configuration
The GitHub service requires a few connection options.
github:
  enterpriseUrl: "https://your-enterprise-address.com"
  auth:
    id: 123
    privateKeyFile: github-key.pem
  webhook:
    secret: secrettoken
  oauth:
    client_id: foo
    client_secret: bar
    redirect_uri: https://example.com/oauth/
  defaultOptions:
    showIssueRoomLink: false
If you are using an on-premise / enterprise edition of GitHub, you need provide the base URL in enterpriseUrl.
You do not need to specify the /api/... path in the URL.
In the auth section, you will need to supply the App ID given in your GitHub App page.
The privateKeyFile can be generated by clicking "Generate a private key" under the Private keys section on the GitHub app page.
Docker users should store this file alongside config.yml and provide the path /data/github-key.pem.
The webhook section takes a secret, which is Webhook secret on the GitHub App page.
The oauth section should include both the Client ID and Client Secret on the GitHub App page.
The redirect_uri value must be the public path to /oauth on the webhooks path. E.g. if your load balancer
points https://example.com/hookshot to the bridge webhooks listener, you should use the path https://example.com/hookshot/oauth.
This value MUST exactly match the Callback URL on the GitHub App page.
defaultOptions allows you to set some defaults for room connections. Options listed on this page
are supported.
Next steps
If you have followed these steps correctly, GitHub should now be configured with hookshot 🥳.
You can now follow the guide on authenticating with GitHub, and then bridging a room
GitLab
Configuration
GitLab configuration is fairly straight-forward:
gitlab:
  # (Optional) Configure this to enable GitLab support
  #
  instances:
    gitlab.com:
      url: https://gitlab.com
  webhook:
    secret: secrettoken
    publicUrl: https://example.com/webhooks/
You need to list all the instances you plan to connect to in the config.yml. This is
used so that users can give a short name like gitlab or matrix.org when they want
to specify an instance.
You should generate a webhook secret (e.g. pwgen -n 64 -s 1) and then use this as your
"Secret token" when adding webhooks.
/ as the public path for webhook delivery. This path is now deprecated and /gitlab/webhook should be used wherever possible.
The publicUrl must be the URL where GitLab webhook events are received (i.e. the path to /gitlab/webhook
for your webhooks listener).
action field in the body of the
request which means they won't show up in the room. You can check the logs to see
if the request made it through, however.
Adding a repository
You can now follow the guide on authenticating with GitLab, and then bridging a room
JIRA
Adding a webhook to a JIRA Instance
This should be done for the JIRA instance you wish to bridge. The setup steps vary for Cloud and Enterprise (on-premise).
/ as the public path for webhook delivery. This path is now deprecated and /jira/webhook should be used wherever possible.
Cloud
See https://support.atlassian.com/jira-cloud-administration/docs/manage-webhooks/ for documentation on how to setup webhooks.
Hookshot requires that you use a secret. Please copy the generated secret value to you config (seen below).
Enterprise
You need to go to the WebHooks configuration page under Settings > System.
Note that this may require administrative access to the JIRA instance.
Next, add a webhook that points to /jira/webhook on the public webhooks address for hookshot. You must also include a
secret value by appending ?secret=your-webhook-secret. The secret value can be anything, but should
be reasonably secure and should also be stored in the config.yml file.
For both, ensure that you enable all the events that you wish to be bridged.
Configuration
You can now set some configuration in the bridge config.yml:
jira:
  webhook:
    secret: your-webhook-secret
  oauth: ... # See below
You can omit the oauth section if you are not planning to allow users to log in and use interactive features (i.e. webhook only mode).
Connecting Matrix users to JIRA
Hookshot allows Matrix users to directly interact with JIRA through the bridge. The setup process differs depending on whether you are running a on-premise/enterprise instance or using Atlassian's cloud service.
JIRA OAuth for Cloud
You will need a Atlassian account with the ability to use the developer tools in order to create the app.
You'll first need to head to https://developer.atlassian.com/console/myapps/create-3lo-app/ to create a "OAuth 2.0 (3LO)" integration.
Once named and created, you will need to:
- Enable the User REST, Jira Platform REST and User Identity APIs under Permissions.
- Use rotating tokens under Authorisation.
- Set a callback url. This will be the public URL to hookshot with a path of
/jira/oauth. - Copy the client ID and Secret from Settings
You can now set some configuration in the bridge config.yml
jira:
  webhook:
    # A secret string generated by you.
    secret: some-secret
  oauth:
    client_id: your-client-id
    client_secret: your-client-secret
    redirect_uri: https://example.com/hookshot/jira/oauth
The redirect_uri value must be the public path to /jira/oauth on the webhooks path. E.g. if your load balancer
points https://example.com/hookshot to the bridge webhooks listener, you should use the path https://example.com/hookshot/jira/oauth.
This value MUST exactly match the Callback URL on the JIRA integration page page.
JIRA for On-Premise (Datacenter)
These instructions are written for Jira Datacenter 8.x.
These instructions use openssl to generate certificates, so users on non-Unix systems will need to find an alternative way to generate these certificates.
To begin, configure your config.yml:
jira:
  url: https://yourjirainstance.com # The location of your jira instance.
  webhook:
    # A secret string generated by you.
    secret: Ieph7iecheiThoo1othaineewieSh1koh2chainohtooyoh4waht1oetoaSoh6oh
  oauth:
    # Another secret key generated by you.
    consumerKey: secret-consumer-key
    # Path to a private key. Generate this with `openssl genrsa -out jira_privatekey.pem 4096`
    privateKey: jira_privatekey.pem
    # The path to your webhooks listener on the "/jira/oauth" path.
    redirect_uri: http://localhost:5065/jira/oauth
To start with, set up your JIRA instance to support OAuth.
- Open the Administration page for your JIRA instance.
- Click Applications.
- Click Application Links.
- Newer versions of JIRA need you to click "Create link"
- In the text box, enter "https://github.com/Half-Shot/matrix-hookshot". Jira will complain but click Continue.
- Fill in the details:
- The Application Name can be anything, but for simplicty we usually use
matrix-hookshot - The Application Type should be Generic Application
- The Consumer key, and shared secret can be any string, they are not used.
- The URLs can be any URL, they are not used (e.g.
https://example.com) - Ensure you enable Create incoming link
- Click Continue
- The Application Name can be anything, but for simplicty we usually use
- On the next step:
- Enter your
consumerKeyfrom the config file above. - The
consumerNamecan be anything, but will be visible to users of your app. You could use something likeMatrix,Hookshotor anything else. - The
publicKeycan be generated by runningopenssl rsa -in jira_privatekey.pem -pubouton the key you created earlier.
- Enter your
- Congratulations, you now have OAuth set up.
Next steps
If you have followed these steps correctly, JIRA should now be configured with hookshot 🥳.
You can now follow the guide on authenticating with JIRA.
Webhooks
Hookshot supports two kinds of webhooks, inbound (previously known as Generic Webhooks) and outbound.
Configuration
You will need to add the following configuration to the config file.
generic:
  enabled: true
  outbound: true # For outbound webhook support
  urlPrefix: https://example.com/mywebhookspath/
  allowJsTransformationFunctions: false
  waitForComplete: false
  enableHttpGet: false
  # maxExpiryTime: 30d
  # sendExpiryNotice: false
  # userIdPrefix: webhook_
Inbound webhooks may also be specified statically
Inbound Webhooks
Hookshot supports generic webhook support so that services can send messages into Matrix rooms without being aware of the Matrix protocol. This works by having services hit a unique URL that then transforms a HTTP payload into a Matrix message.
The webhooks listener listens on the path /webhook.
The bridge listens for incoming webhooks requests on the host and port provided in the listeners config.
urlPrefix describes the public facing URL of your webhook handler. For instance, if your load balancer redirected
webhook requests from https://example.com/mywebhookspath to the bridge (on /webhook), an example webhook URL would look like:
https://example.com/mywebhookspath/abcdef.
waitForComplete causes the bridge to wait until the webhook is processed before sending a response. Some services prefer you always
respond with a 200 as soon as the webhook has entered processing (false) while others prefer to know if the resulting Matrix message
has been sent (true). By default this is false.
includeHookBody will determine whether the bridge will include the full webhook request body
(uk.half-shot.hookshot.webhook_data) inside the Matrix event. By default this is true.
enableHttpGet means that webhooks can be triggered by GET requests, in addition to POST and PUT. This was previously on by default,
but is now disabled due to concerns mentioned below.
maxExpiryTime sets an upper limit on how long a webhook can be valid for before the bridge expires it. By default this is unlimited. This
takes a duration represented by a string. E.g. "30d" is 30 days. See this page
for available units. Additionally:
sendExpiryNoticeconfigures whether a message is sent into a room when the connection is close to expiring.requireExpiryTimeforbids creating a webhook without a expiry time. This does not apply to existing webhooks.
You may set a userIdPrefix to create a specific user for each new webhook connection in a room. For example, a connection with a name
like example for a prefix of webhook_ will create a user called @webhook_example:example.com. If you enable this option,
you need to configure the user to be part of your registration file e.g.:
# registration.yaml
---
namespaces:
  users:
    - regex: "@webhook_.+:example.com" # Where example.com is your domain name.
      exclusive: true
Adding a webhook
To add a webhook to your room:
- Invite the bot user to the room.
- Make sure the bot able to send state events (usually the Moderator power level in clients)
- Say
!hookshot webhook examplewhereexampleis a name for your hook. - The bot will respond with the webhook URL to be sent to services.
Webhook Handling
Hookshot handles POST and PUT HTTP requests by default.
Hookshot handles HTTP requests with a method of GET, POST or PUT.
If the request is a GET request, the query parameters are assumed to be the body. Otherwise, the body of the request should be a supported payload.
If the body contains a text key, then that key will be used as a message body in Matrix (aka body). This text will be automatically converted from Markdown to HTML (unless
a html key is provided.).
If the body contains a html key, then that key will be used as the HTML message body in Matrix (aka formatted_body). A text key fallback MUST still be provided.
If the body also contains a username key, then the message will be prepended by the given username. This will be prepended to both text and html.
If the body does NOT contain a text field, the full payload will be sent to the room. This can be adapted into a message by creating a JavaScript transformation function.
Payload formats
If the request is a POST/PUT, the body of the request will be decoded and stored inside the event. Currently, Hookshot supports:
- XML, when the
Content-Typeheader ends in/xmlor+xml. - Web form data, when the
Content-Typeheader isapplication/x-www-form-urlencoded. - JSON, when the
Content-Typeheader isapplication/json. - Text, when the
Content-Typeheader begins withtext/.
Decoding is done in the order given above. E.g. text/xml would be parsed as XML. Any formats not described above are not
decoded.
GET requests
In previous versions of hookshot, it would also handle the GET HTTP method. This was disabled due to concerns that it was too easy for the webhook to be
inadvertently triggered by URL preview features in clients and servers. If you still need this functionality, you can enable it in the config.
Hookshot will insert the full content of the body into a key under the Matrix event called uk.half-shot.hookshot.webhook_data, which may be useful if you have
other integrations that would like to make use of the raw request body.
uk.half-shot.hookshot.webhook_data field will automatically convert any float values
to a string representation of that value. This change is not applied to the JavaScript transformation data
variable, so it will contain proper float values.
Wait for complete
It is possible to choose whether a webhook response should be instant, or after hookshot has handled the message. The reason
for this is that some services expect a quick response time (like Slack) whereas others will wait for the request to complete. You
can specify this either globally in your config, or on the widget with waitForComplete.
If you make use of the webhookResponse feature, you will need to enable waitForComplete as otherwise hookshot will
immeditately respond with it's default response values.
Expiring webhooks
Webhooks can be configured to expire, such that beyond a certain date they will fail any incoming requests. Currently this expiry time
is mutable, so anybody able to configure connections will be able to change the expiry date. Hookshot will send a notice to the room
at large when the webhook has less than 3 days until it's due to expire (if sendExpiryNotice is set).
JavaScript Transformations
This bridge supports creating small JavaScript snippets to translate an incoming webhook payload into a message for the room, giving you a very powerful ability to generate messages based on whatever input is coming in.
The input is parsed and executed within a separate JavaScript Virtual Machine context, and is limited to an execution time of 2 seconds.
With that said, the feature is disabled by default and allowJsTransformationFunctions must be enabled in the config.
The code snippets can be edited by editing the Matrix state event corresponding to this connection (with a state type of uk.half-shot.matrix-hookshot.generic.hook).
Because this is a fairly advanced feature, this documentation won't go into how to edit state events from your client.
Please seek out documentation from your client on how to achieve this.
The script string should be set within the state event under the transformationFunction key.
Script API
Transformation scripts have a versioned API. You can check the version of the API that the hookshot instance supports
at runtime by checking the HookshotApiVersion variable. If the variable is undefined, it should be considered v1.
The execution environment will contain a data variable, which will be the body of the incoming request (see Payload formats).
Scripts are executed synchronously and expect the result variable to be set.
If the script contains errors or is otherwise unable to work, the bridge will send an error to the room. You can check the logs of the bridge for a more precise error.
V2 API
The v2 api expects an object to be returned from the result variable.
{
  "version": "v2" // The version of the schema being returned from the function. This is always "v2".
  "empty": true|false, // Should the webhook be ignored and no output returned. The default is false (plain must be provided).
  "plain": "Some text", // The plaintext value to be used for the Matrix message.
  "html": "<b>Some</b> text", // The HTML value to be used for the Matrix message. If not provided, plain will be interpreted as markdown.
  "msgtype": "some.type", // The message type, such as m.notice or m.text, to be used for the Matrix message. If not provided, m.notice will be used.
  "mentions": { // Explicitly mention these users, see https://spec.matrix.org/latest/client-server-api/#user-and-room-mentions
    "room": true,
    "user_ids": ["@foo:bar"]
  },
  "hints": {
      "showUrlPreviews": false, // Set to false to disable URL previews for this message, or true to allow receiving clients to generate some.
  },
  "webhookResponse": { // Optional response to send to the webhook requestor. All fields are optional. Defaults listed.
    "body": "{ \"ok\": true }",
    "contentType": "application/json",
    "statusCode": 200
  }
}
Example script
Where data = {"counter": 5, "maxValue": 4}
if (data.counter === undefined) {
  // The API didn't give us a counter, send no message.
  result = { empty: true, version: "v2" };
} else if (data.counter > data.maxValue) {
  result = {
    plain: `**Oh no!** The counter has gone over by ${data.counter - data.maxValue}`,
    version: "v2",
  };
} else {
  result = {
    plain: `*Everything is fine*, the counter is under by ${data.maxValue - data.counter}`,
    version: "v2",
  };
}
V1 API
The v1 API expects result to be a string. The string will be automatically interpreted as Markdown and transformed into HTML. All webhook messages
will be prefixed with Received webhook:. If result is falsey (undefined, false or null) then the message will be No content.
Example script
Where data = {"counter": 5, "maxValue": 4}
if (data.counter > data.maxValue) {
  result = `**Oh no!** The counter has gone over by ${data.counter - data.maxValue}`;
} else {
  result = `*Everything is fine*, the counter is under by ${data.maxValue - data.counter}`;
}
Outbound webhooks
You can also configure Hookshot to send outgoing requests to other services when a message appears on Matrix. To do so, you need to configure hookshot to enable outgoing messages with:
generic:
  outbound: true
Request format
Requests can be sent to any service that accepts HTTP requests. You may configure Hookshot to either use the HTTP PUT (default)
or POST methods.
Each request will contain 3 headers which you may use to authenticate and direct traffic:
- 'X-Matrix-Hookshot-EventId' contains the event's ID.
- 'X-Matrix-Hookshot-RoomId' contains the room ID where the message was sent.
- 'X-Matrix-Hookshot-Token' is the unique authentication token provided when you created the webhook. Use this to verify that the message came from Hookshot.
The payloads are formatted as multipart/form-data.
The first file contains the event JSON data, proviced as the event file. This is a raw representation of the Matrix event data. If the
event was encrypted, this will be the decrypted body.
If any media is linked to in the event, then a second file will be present named media which will contain the media referenced in
the event.
All events that occur in the room will be sent to the outbound URL, so be careful to ensure your remote service can filter the
traffic appropriately (e.g. check the type in the event JSON)
ChallengeHound
You can configure Hookshot to bridge ChallengeHound activites into Matrix.
Getting the API secret.
You will need to email ChallengeHound support for an API token. They seem happy to provide one as long as you are an admin of a challenge. See this support article
challengeHound:
  token: <the token>
Usage
You can add a new challenge hound challenge by command:
challengehound add https://www.challengehound.com/challenge/abc-def
and remove it with the same command
challengehound remove https://www.challengehound.com/challenge/abc-def
Hookshot will periodically refetch activities from the challenge and send a notice when a new one is completed. Note that Hookshot uses your configured cache to store seen activities. If you have not configured Redis caching, it will default to in-memory storage which means activites will repeat on restart.
OpenProject
Setting up Hookshot for OpenProject requires setting up webhooks, and configuring an OAuth2 application so that users may login.
OpenProject
Set up OpenProject to send Webhook requests to hookshot, following the documentation. Please note the following:
- The payload URL will be the address of your
webhookslistener, with the path of/openproject/webhook. - The secret must be set, and must match the value of
webhook.secretbelow. - Hookshot currently uses the "Work packages" events, although more will follow in the future.
- You may enable as many projects as you like, but Hookshot must be configured to route the projects via it's connections principle.
You must also setup an OAuth application, following the documentation. Please note the following:
- The Redirect URL will be the address of your
webhookslistener, with the path of/openproject/oauth. - Only the scope
api_v3is used. - Confidential access should be enabled.
- Do not set a Client Credentials User ID.
Please keep a record of the Client ID and Client Secret to be used in the next step.
Hookshot
You can now set some configuration in the bridge config.yml:
openProject:
  baseUrl: https://your-open-project.com
  webhook:
    secret: secrettoken
  oauth:
    clientId: foo
    clientSecret: bar
    redirectUri: https://example.com/oauth/
Next steps
If you have followed these steps correctly, OpenProject should now be configured 🥳.
You can now follow the guide on authenticating with OpenProject.
Usage
This section covers how to use the bridge, once it's set up. We break these down into categories:
- Authentication: How to connect your user account to a remote service to use rich commands.
- Room Connections: How to start connecting rooms to services.
If you are looking for help on what bot commands you can run in a room, you can refer to the help information by saying*:
!gh helpin rooms connected to GitHub.!gl helpin rooms connected to GitLab.!jira helpin rooms connected to JIRA.
*the prefix may vary if the commandPrefix configuration in the room is set.
Dynamic Rooms
Some bridges support dynamically creating rooms that point to resources based on an alias given by a user.
Presently, the following are supported:
#github_$owner:example.com- For a Matrix space containing a user's discussions and repositories#github_$owner_$repo:example.com- For GitHub repositories#github_$owner_$repo_$issuenumber:example.com- For GitHub issues#github_disc_$owner_$repo:example.com- For GitHub discussions for a repository
Where $word is replaced by the appropriate value.
(Some of these may not be supported, depending on bridge configuration and registration file changes)
Disabling support
This feature can be disabled simply by removing alias fields from the registration file.
Static Connections
Hookshot can also now be configured with "static connections". These allow system administrators to configure Hookshot with pre-specified set of connections which cannot be altered at runtime, but will have predictable configuration without any interactions with Matrix.
Not all connection types are currently suitable for static configuration, the supported types are listed below.
Generic Hook uk.half-shot.matrix-hookshot.generic.hook
Generic (inbound) webhooks can be configured, an example configuration is below:
connections:
 - connectionType: uk.half-shot.matrix-hookshot.generic.hook
   stateKey: id-used-by-webhook
   roomId: "!any-room-id:example.org"
   state:
     name: My static hook
     # All below are optional
     waitForComplete: true
     includeHookBody: true
     expirationDate: 2025-11-03T16:44:59.533Z
     transformationFunction: |
        result = {
            plain: "*Everything is fine*",
            version: "v2",
        };
}
You may then send requests to http(s)://example.org/webhooks/id-used-by-webhook to activate the webhook.
See the webhook documentation for more help on configuring hooks.
Authenticating
Some services allow you to authenticate with them, to pair your Matrix identity with your remote identity on the service. This can be used to ensure you have the required permission on the remote application, or be able to execute commands like creating tickets.
All services mentioned below support authenticating via a DM room with the bridge bot, using bot commands.
In this guide, we are going to assume the bot is called @hookshot:example.com but this will vary for your setup. For all the instructions below, commands should only be executed in your DM room with hookshot.
Some services additionally support logging in via the widget, without the use of a DM room or bot commands. These are mentioned explicitly.
GitHub
Personal access token
You can authenticate via OAuth or a Personal Access Token (PAT) when using GitHub. Authentication is required when trying to bridge GitHub resources into rooms.
To authenticate with a personal access token:
-
Open https://github.com/settings/tokens (Github > Settings > Developer Settings / Personal access tokens)
-
Click Generate new token
-
Give it a good name, and a sensible expiration date. For scopes you will need:
- Repo (to access repo information)
- If you want notifications for private repos, you need
repo: Full control of private repositories. If you just want notifications for public repos, you only need:- repo:status
- public_repo
- If you want notifications for private repos, you need
- Workflow (if you want to be able to launch workflows / GitHub actions from Matrix)
- Notifications (if you want to bridge in your notifications to Matrix)
- User
- read:user
- write:discussion (for GitHub discussion support)
- read:discussion
- Repo (to access repo information)
-
Send the generated token to the bridge by saying
github setpersonaltoken %your-token%. You can redact the message afterwards if you like. -
The bridge will have connected you.
OAuth
To authenticate via OAuth, you will need to have configured OAuth support in your config.yml, and have the endpoints required accessible from the internet.
- Say
github loginto get the URL to authenticate via. - Click the URL sent by the bot.
- Follow the steps, ensuring you authenticate with the right user.
- If all goes well, you will now be connected.
- You can check the status of authenticated instances by saying
github status.
You may also authenticate via a widget, if you have configured widgets
GitLab
You can authenticate with GitLab by supplying a Personal Access Token. OAuth-style authentication isn't supported yet.
- You will need to have configured a GitLab instance in your config.yml for the instance you want to log in to.
- Open https://%instance%/-/profile/personal_access_tokens (GitLab > User Settings > Access Tokens), where instance is your GitLab instance address.
- For the public GitLab server, this would be "gitlab.com"
- Give it a good name, and a sensible expiration date. For scopes you will need to tick
api. - Send the generated token to the bridge by saying
gitlab personaltoken %instance% %your-token%. You can redact the message afterwards if you like. - The bridge will have connected you. You can check the status at any time by saying
gitlab hastoken %instance%
JIRA
You can log in to JIRA via OAuth. This means you will need to have configured OAuth support in your config.yml, and
have the endpoints required accessible from the internet. Authentication is required when trying to bridge JIRA resources into rooms.
- Say
jira login, which will generate a unique URL. - Click the URL sent by the bot.
- Follow the steps, ensuring you authenticate with the right user.
- If all goes well, you will now be connected. You can check the status of authenticated instances by saying
jira whoami
OpenProject
You can log in to OpenProject via OAuth. Authentication is required when trying to bridge OpenProject into rooms.
- Say
openproject login, which will generate a unique URL. - Click the URL sent by the bot.
- Follow the steps, ensuring you authenticate with the right user.
- If all goes well, you will now be connected.
You may also authenticate via a widget, if you have configured widgets
Room Configuration
Hookshot works off the principle of Connections.
A room can have many connections to different services. The connections are defined in the room state of a room. A connection defines the service it connects to, the type of integration (e.g. GitHub repo, Jira Project) and any additional configuration.
Hookshot supports several connection types, which are defined under the Room Configuration heading.
The availability of connection types depends on the configuration provided to hookshot.
The !hookshot command
Rooms can be bridged by inviting the hookshot bot into a room, and then running the
!hookshot command. Running !hookshot help will give you some details, but you should
see the documentation provided for information on each connection type.
GitHub Repository
This connection type connects a GitHub repository (e.g. https://github.com/matrix-org/matrix-hookshot) to a room.
You can run commands to create and manipulate issues, and receive notifications when something changes such as a new release.
Setting up
To set up a connection to a GitHub Repository in a new room:
(NB you must have permission to bridge GitHub repositories before you can use this command, see auth.)
- The bridge will need to either:
- Have a GitHub installation registered with the organisation (or GitHub user account)
- The requesting user must be authenticated with the bridge via OAuth and the repository must be part of their GitHub account.
- Create a new, unencrypted room. It can be public or private.
- Invite the bridge bot (e.g.
@hookshot:example.com). - Give the bridge bot moderator permissions or higher (power level 50) (or otherwise configure the room so the bot can edit room state).
- Send the command
!hookshot github repo https://github.com/my/project. - If you have permission to bridge this repo, the bridge will respond with a confirmation message.
Configuration
This connection supports a few options which can be defined in the room state:
| Option | Description | Allowed values | Default |
|---|---|---|---|
| enableHooks 1 | Enable notifications for some event types | Array of: Supported event types | If not defined, defaults are mentioned below |
| ignoreHooks 1 | deprecated Choose to exclude notifications for some event types | Array of: Supported event types | empty |
| commandPrefix | Choose the prefix to use when sending commands to the bot | A string, ideally starts with "!" | !gh |
| showIssueRoomLink | When new issues are created, provide a Matrix alias link to the issue room | true/false | false |
| prDiff | Show a diff in the room when a PR is created, subject to limits | {enabled: boolean, maxLines: number} | {enabled: false} |
| includingLabels | Only notify on issues matching these label names | Array of: String matching a label name | empty |
| excludingLabels | Never notify on issues matching these label names | Array of: String matching a label name | empty |
| hotlinkIssues | Send a link to an issue/PR in the room when a user mentions a prefix followed by a number | { prefix: string } | {prefix: "#"} |
| newIssue | Configuration options for new issues | { labels: string[] } | empty |
| newIssue.labels | Automatically set these labels on issues created via commands | Array of: String matching a label name | empty |
| workflowRun | Configuration options for workflow run results | { matchingBranch: string } | empty |
| workflowRun.matchingBranch | Only report workflow runs if it matches this regex. | Regex string | empty |
| workflowRun.includingWorkflows | Only report workflow runs with a matching workflow name. | Array of: String matching a workflow name | empty |
| workflowRun.excludingWorkflows | Never report workflow runs with a matching workflow name. | Array of: String matching a workflow name | empty |
ignoreHooks is no longer accepted for new state events. Use enableHooks to explicitly state all events you want to see.
Supported event types
This connection supports sending messages when the following actions happen on the repository.
Note: Some of these event types are enabled by default (marked with a *). When ignoreHooks is defined,
the events marked as default below will be enabled. Otherwise, this is ignored.
- issue *
- issue.created *
- issue.changed *
- issue.edited *
- issue.labeled *
- pull_request *
- pull_request.closed *
- pull_request.merged *
- pull_request.opened *
- pull_request.ready_for_review *
- pull_request.reviewed *
- push
- release *
- release.created *
- release.drafted
- workflow.run
- workflow.run.success
- workflow.run.failure
- workflow.run.neutral
- workflow.run.cancelled
- workflow.run.timed_out
- workflow.run.stale
- workflow.run.action_required
GitLab Project
This connection type connects a GitLab project (e.g. https://gitlab.matrix.org/matrix-org/olm) to a room.
Setting up
To set up a connection to a GitLab project in a new room:
(NB you must have permission to bridge GitLab repositories before you can use this command, see auth.)
- Create a new, unencrypted room. It can be public or private.
- Invite the bridge bot (e.g.
@hookshot:example.com). - Give the bridge bot moderator permissions or higher (power level 50) (or otherwise configure the room so the bot can edit room state).
- Send the command
!hookshot gitlab project https://mydomain/my/project. - If you have permission to bridge this repo, the bridge will respond with a confirmation message. (Users with
Developerpermissions or greater can bridge projects.) - If you have configured the bridge with a
publicUrlinsidegitlab.webhookin your config, you authenticated with Hookshot on that instance in your admin room, and you haveMaintainerpermissions or greater on the project, the bot will automatically provision the webhook for you. - Otherwise, you'll need to manually configure the project with a webhook that points to your public address for the webhooks listener, sets the "Secret token" to the one you put in your Hookshot configuration (
gitlab.webhook.secret), and enables all Triggers that need to be bridged (as Hookshot can only bridge events for enabled Triggers). This can be configured on the GitLab webpage for the project under Settings > Webhook Settings. If you do not have access to this page, you must ask someone who does (i.e. someone with at leastMaintainerpermissions on the project) to add the webhook for you.
Configuration
This connection supports a few options which can be defined in the room state1:
| Option | Description | Allowed values | Default |
|---|---|---|---|
| commandPrefix | Choose the prefix to use when sending commands to the bot | A string, ideally starts with "!" | !gh |
| enableHooks 2 | Enable notifications for some event types | Array of: Supported event types | If not defined, defaults are mentioned below |
| excludingLabels | Never notify on issues matching these label names | Array of: String matching a label name | empty |
| ignoreHooks 2 | deprecated Choose to exclude notifications for some event types | Array of: Supported event types | empty |
| includeCommentBody | Include the body of a comment when notifying on merge requests | Boolean | false |
| includingLabels | Only notify on issues matching these label names | Array of: String matching a label name | empty |
| pushTagsRegex | Only mention pushed tags which match this regex | Regex string | empty |
ignoreHooks is no longer accepted for new state events. Use enableHooks to explicitly state all events you want to see.
To change room state with Element Web/Desktop: open devtools by typing /devtools + enter in the chat box, and click on "Explore room state". Next, choose uk.half-shot.matrix-hookshot.gitlab.repository. You'll then be able to see and edit (if you have the required permissions) the settings by setting properties on the JSON object directly.
Supported event types
This connection supports sending messages when the following actions happen on the repository.
Note: Some of these event types are enabled by default (marked with a *). When ignoreHooks is defined,
the events marked as default below will be enabled. Otherwise, this is ignored.
- merge_request *
- merge_request.close *
- merge_request.merge *
- merge_request.open *
- merge_request.reopen *
- merge_request.review.comments *
- merge_request.review *
- merge_request.review.individual
- push *
- release *
- release.created *
- tag_push *
- wiki *
JIRA Project
This connection type connects a JIRA project to a room.
You can run commands to create and assign issues, and receive notifications when issues are created.
Setting up
To set up a connection to a JIRA project in a new room:
(NB you must have permission to bridge JIRA projects before you can use this command, see auth.)
- Create a new, unencrypted room. It can be public or private.
- Invite the bridge bot (e.g.
@hookshot:example.com). - Give the bridge bot moderator permissions or higher (power level 50) (or otherwise configure the room so the bot can edit room state).
- Send the command
!hookshot jira project https://jira-instance/.../projects/PROJECTKEY/.... - If you have permission to bridge this repo, the bridge will respond with a confirmation message.
Managing connections
Send the command !hookshot jira list project to list all of a room's connections to JIRA projects.
Send the command !hookshot jira remove project <url> to remove a room's connection to a JIRA project at a given URL.
Configuration
This connection supports a few options which can be defined in the room state:
| Option | Description | Allowed values | Default |
|---|---|---|---|
| events | Choose to include notifications for some event types | Array of: Supported event types | issue_created |
| commandPrefix | Choose the prefix to use when sending commands to the bot | A string, ideally starts with "!" | !jira |
Supported event types
This connection supports sending messages when the following actions happen on the project.
- issue
- issue_created
- issue_updated
- version
- version_created
- version_updated
- version_released
Prometheus Metrics
You can configure metrics support by adding the following to your config:
metrics:
  enabled: true
  bindAddress: 127.0.0.1
  port: 9002
Hookshot will then provide metrics on 127.0.0.1 at port 9002.
An example dashboard that can be used with Grafana can be found at /contrib/hookshot-dashboard.json. There are 3 variables at the top of the dashboard:

Select the Prometheus instance with your Hookshot metrics as Data Source. Set Interval to your scraping interval. Set 2x Interval to twice the Interval value (why?).
Below is the generated list of Prometheus metrics for Hookshot.
hookshot
| Metric | Help | Labels | |--------|------|--------|| hookshot_webhooks_http_request | Number of requests made to the hookshot webhooks handler | path, method | | hookshot_provisioning_http_request | Number of requests made to the hookshot provisioner handler | path, method | | hookshot_queue_event_pushes | Number of events pushed through the queue | event | | hookshot_connection_event_failed | Number of events that failed to process | event, connectionId | | hookshot_connections | Number of active hookshot connections | service | | hookshot_notifications_push | Number of notifications pushed | service | | hookshot_notifications_service_up | Whether the notification service is up or down | service | | hookshot_notifications_watchers | Number of notifications watchers running | service | | hookshot_feeds_count | Number of RSS feeds that hookshot is subscribed to | | | hookshot_feeds_fetch_ms | Time taken for hookshot to fetch all feeds | | | hookshot_feeds_failing | Number of RSS feeds that hookshot is failing to read | reason |
matrix
| Metric | Help | Labels | |--------|------|--------|| matrix_api_calls | Number of Matrix client API calls made | method | | matrix_api_calls_failed | Number of Matrix client API calls which failed | method | | matrix_appservice_events | Number of events sent over the AS API | | | matrix_appservice_decryption_failed | Number of events sent over the AS API that failed to decrypt | |
feed
| Metric | Help | Labels | |--------|------|--------|| feed_count | (Deprecated) Number of RSS feeds that hookshot is subscribed to | | | feed_fetch_ms | (Deprecated) Time taken for hookshot to fetch all feeds | | | feed_failing | (Deprecated) Number of RSS feeds that hookshot is failing to read | reason |
process
| Metric | Help | Labels | |--------|------|--------|| process_cpu_user_seconds_total | Total user CPU time spent in seconds. | | | process_cpu_system_seconds_total | Total system CPU time spent in seconds. | | | process_cpu_seconds_total | Total user and system CPU time spent in seconds. | | | process_start_time_seconds | Start time of the process since unix epoch in seconds. | | | process_resident_memory_bytes | Resident memory size in bytes. | | | process_virtual_memory_bytes | Virtual memory size in bytes. | | | process_heap_bytes | Process heap size in bytes. | | | process_open_fds | Number of open file descriptors. | | | process_max_fds | Maximum number of open file descriptors. | |
nodejs
| Metric | Help | Labels | |--------|------|--------|| nodejs_eventloop_lag_seconds | Lag of event loop in seconds. | | | nodejs_eventloop_lag_min_seconds | The minimum recorded event loop delay. | | | nodejs_eventloop_lag_max_seconds | The maximum recorded event loop delay. | | | nodejs_eventloop_lag_mean_seconds | The mean of the recorded event loop delays. | | | nodejs_eventloop_lag_stddev_seconds | The standard deviation of the recorded event loop delays. | | | nodejs_eventloop_lag_p50_seconds | The 50th percentile of the recorded event loop delays. | | | nodejs_eventloop_lag_p90_seconds | The 90th percentile of the recorded event loop delays. | | | nodejs_eventloop_lag_p99_seconds | The 99th percentile of the recorded event loop delays. | | | nodejs_active_resources | Number of active resources that are currently keeping the event loop alive, grouped by async resource type. | type | | nodejs_active_resources_total | Total number of active resources. | | | nodejs_active_handles | Number of active libuv handles grouped by handle type. Every handle type is C++ class name. | type | | nodejs_active_handles_total | Total number of active handles. | | | nodejs_active_requests | Number of active libuv requests grouped by request type. Every request type is C++ class name. | type | | nodejs_active_requests_total | Total number of active requests. | | | nodejs_heap_size_total_bytes | Process heap size from Node.js in bytes. | | | nodejs_heap_size_used_bytes | Process heap size used from Node.js in bytes. | | | nodejs_external_memory_bytes | Node.js external memory size in bytes. | | | nodejs_heap_space_size_total_bytes | Process heap space size total from Node.js in bytes. | space | | nodejs_heap_space_size_used_bytes | Process heap space size used from Node.js in bytes. | space | | nodejs_heap_space_size_available_bytes | Process heap space size available from Node.js in bytes. | space | | nodejs_version_info | Node.js version info. | version, major, minor, patch | | nodejs_gc_duration_seconds | Garbage collection duration by kind, one of major, minor, incremental or weakcb. | kind |
Sentry
Hookshot supports Sentry error reporting.
You can configure Sentry by adding the following to your config:
sentry:
  dsn: https://examplePublicKey@o0.ingest.sentry.io/0 # The DSN for your Sentry project.
  environment: production # The environment sentry is being used in. Can be omitted.
Sentry will automatically include the name of your homeserver as the serverName reported.
Troubleshooting
If you are having difficulties getting set up with hookshot, the advice below might be able to resolve common issues.
If none of these help, please come chat to us in (#hookshot:half-shot.uk). Please try to follow these steps first, as live support is best effort.
1. The hookshot bot doesn't acknowledge an invite.
In 99% of cases, this is because the homeserver cannot reach the appservice. Synapse for example will log an error like:
synapse.http.client - 422 - INFO - as-recoverer-339 - Error sending request to  PUT http://yourhookshoturl/_matrix/app/v1/transactions/123: ConnectionRefusedError Connection refused
synapse.appservice.api - 405 - WARNING - as-recoverer-339 - push_bulk to http://yourhookshoturl threw exception(ConnectionRefusedError) Connection was refused by other side: 111: Connection refused. args=('Connection refused',)
synapse.appservice.scheduler - 480 - INFO - as-recoverer-339 - Scheduling retries on hookshot in Ns
It's hard to offer targeted advice on resolving networking issues, but a good thing to try is to check whether you can reach hookshot at all from the homeservers environment. For instance:
$ curl http://yourhookshoturl/_matrix/app/
should give you a response (even if it's an error).
Docker
It is also worth noting that if you are in a docker environment, the url in your registration YAML file must match the
path Synapse expects to reach the service on. So if your container is called hookshot and it's configured to listen
on port 9993, then you should configure the url to be http://hookshot:9993.
2. The bot joins, but doesn't respond to my messages.
Check that you are sending the right format message. !hookshot help should always work.
Otherwise, check whether the room is encrypted and you haven't enabled encryption for the bot.
The bot will ignore any messages in encrypted rooms.
You'll need to either create the room as unencrypted or enable encryption for the bot.
If this doesn't resolve your issue, check Problem #1 to make sure it's not a networking issue.
3. The bot works, but is offline in my client.
This is expected. Hookshot doesn't support "presence" which is how Matrix determines online/offline status.
Contributing
Hi there! Please read the CONTRIBUTING.md guide for all matrix.org bridge projects.
Hookshot Guidelines
- Hookshot presently uses the
mainbranch as the default branch (instead ofdevelop). - Since Hookshot caters to a range of services, we have additional tags such as
GitHub,GitLabwhich help us determine which services are affected by an issue. - In addition to Typescript, Hookshot makes use of Rust. You will need to setup Rust in order to build the project. https://rustup.rs/ is a good option for most people.
- The official hookshot support/development room is #hookshot:half-shot.uk
If you are planning on contributing a code change, check out our developer documentation
Setting up a development environment
Getting started with Hookshot development is pretty easy! If you are familiar with Matrix server management, and specifically integration development then you will probably be quite comfortable just using our standard install process.
If you are less familar, then we have a Docker Compose setup that requires very minimal effort to get going.
Local installation (on host)
Follow the local install process, and the configuration guide.
Once that's done, make changes at will and simply run pnpm run build and then pnpm start to run your new changes.
Keep in mind that the widgets feature does federated lookups, which do not work well over HTTP / localhost. To get around this, include the follwing
in your config file:
widgets:
  # ...
  openIdOverrides:
    "localhost": "http://your-synapse-listener"
Hookshot will warn and generally get a bit fussy in the logs, but you can ignore it in the safe knowledge you are not using this in production.
Docker Compose
The only hard requirements for this process are that you have Docker compose installed.
The steps to a complete test environment are as follows:
- Checkout the project repository from https://github.com/matrix-org/matrix-hookshot.
- Create an empty
config.ymlfile in the root of your checkout. - Run
docker compose up. This may take some time for all the images to be present. - Go to
http://localhost:8083and register a new user. - Create a new room, invite
@hookshot:localhost. - Promote it to Moderator as requested.
- Go to the Hookshot widget (under extensions) to configure a webhook.
This gives you a very basic experience, but we can configure this further. You can extend the config.yml with any of the options in the sample config. Keep in mind certain configuration options are pre-filled to ensure compatibility in the Docker environment. To override those settings
you will need to copy the appropirate configuration block from contrib/docker/config.yaml.
CA Certificates for developing against local HTTPS services
If you prefer to develop against services that require adding a CA file, you can follow the official advice which works for the Hookshot image.
Workers
Hookshot supports running in a worker configuration, using Redis as the middleman process to handle traffic between processes.
Running in multi-process mode
You must first have a working Redis instance somewhere which can talk between processes. For example, in Docker you can run:
docker run --name redis-host -p 6379:6379 -d redis.
The processes should all share the same config, which should contain the correct config to enable Redis:
queue:
  redisUri: "redis://redis-host:6379"
cache:
  redisUri: "redis://redis-host:6379"
Note that if encryption is enabled, you MUST enable the cache config but NOT the queue config. Workers require persistent
storage in Redis, but cannot make use of worker-mode queues.
Once that is done, you can simply start the processes by name using pnpm:
pnpm start:webhooks
pnpm start:matrixsender
pnpm start:app
Be aware that you will need to start all worker types when running in worker mode, as the service does not allow a hybrid worker approach.
Encryption
Hookshot supports end-to-bridge encryption via MSC3202, and MSC4203. Hookshot needs to be configured against a a homeserver that supports these features, such as Synapse.
Please check with your homeserver implementation before reporting bugs against matrix-hookshot.
Enabling encryption in Hookshot
In order for Hookshot to use encryption, it must be configured as follows:
- The
encryption.storagePathsetting must point to a directory that Hookshot has permissions to write files into. If running with Docker, this path should be within a volume (for persistency). Hookshot uses this directory for its crypto store (i.e. long-lived state relating to its encryption keys).- Once a crypto store has been initialized, its files must not be modified, and Hookshot cannot be configured to use another crypto store of the same type as one it has used before. If a crypto store's files get lost or corrupted, Hookshot may fail to start up, or may be unable to decrypt command messages. To fix such issues, stop Hookshot, then reset its crypto store by running
pnpm start:resetcrypto.
- Once a crypto store has been initialized, its files must not be modified, and Hookshot cannot be configured to use another crypto store of the same type as one it has used before. If a crypto store's files get lost or corrupted, Hookshot may fail to start up, or may be unable to decrypt command messages. To fix such issues, stop Hookshot, then reset its crypto store by running
- Redis must be enabled. Note that worker mode is not yet supported with encryption, so
queueMUST NOT be configured.
If you ever reset your homeserver's state, ensure you also reset Hookshot's encryption state. This includes clearing the storagePath directory and all worker state stored in your redis instance. Otherwise, Hookshot may fail on start up with registration errors.
Also ensure that Hookshot's appservice registration file contains every line from registration.sample.yml that appears after the If enabling encryption comment. Note that changing the registration file may require restarting the homeserver that Hookshot is connected to.
Running with Synapse
Synapse has functional support for MSC3202 and MSC4203 as of v1.63.0. To enable it, add the following section to Synapse's configuration file (typically named homeserver.yaml):
You may notice that MSC2409 is not listed above. Due to the changes being split out from MSC2409, msc2409_to_device_messages_enabled refers to MSC4203.
experimental_features:
  msc3202_device_masquerading: true
  msc3202_transaction_extensions: true
  msc2409_to_device_messages_enabled: true
Widgets
Hookshot supports using widgets to configure connections in rooms. Widgets allow users to view and configure rooms without the need to type commands. The widget feature is designed to complement the existing command system, rather than replace it.
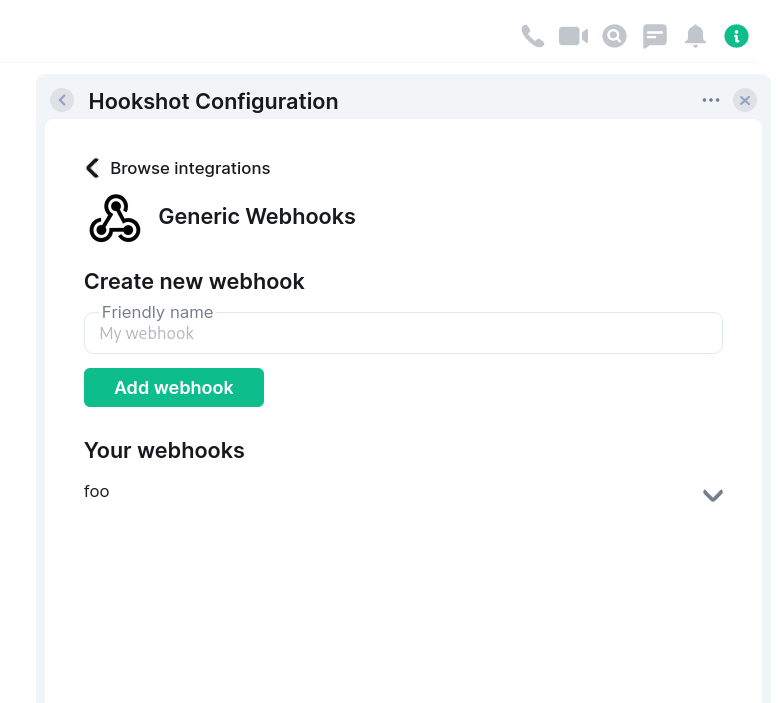
Configuration
widgets:
  addToAdminRooms: false
  roomSetupWidget:
    addOnInvite: false
  # disallowedIpRanges:
  #     - 127.0.0.0/8
  #     - 10.0.0.0/8
  #     - 172.16.0.0/12
  #     - 192.168.0.0/16
  #     - 100.64.0.0/10
  #     - 192.0.0.0/24
  #     - 169.254.0.0/16
  #     - 192.88.99.0/24
  #     - 198.18.0.0/15
  #     - 192.0.2.0/24
  #     - 198.51.100.0/24
  #     - 203.0.113.0/24
  #     - 224.0.0.0/4
  #     - ::1/128
  #     - fe80::/10
  #     - fc00::/7
  #     - 2001:db8::/32
  #     - ff00::/8
  #     - fec0::/10
  publicUrl: https://example.com/widgetapi/v1/static
  branding:
    widgetTitle: Hookshot Configuration
  openIdOverrides:
    my-local-server: "http://localhost"
The admin room feature is still very barebones so while it's included here for completeness, most instances
should leave addToAdminRooms off (as it is by default). This flag will add an "admin room" widget to user admin rooms.
The room setup feature is more complete, supporting generic webhook configuration (with more options coming soon).
This can be enabled by setting roomSetupWidget to an object. You can add the widget by saying !hookshot setup-widget in any room.
When addOnInvite is true, the bridge will add a widget to rooms when the bot is invited, and the room has no existing connections.
disallowedIpRanges describes which IP ranges should be disallowed when resolving homeserver IP addresses (for security reasons).
Unless you know what you are doing, it is recommended to not include this key. The default blocked IPs are listed above for your convenience.
allowedIpRanges describes which IP ranges within disallowedIpRanges are explicitly allow-listed.
This removes the need to override disallowedIpRanges to remove or adjust specific IP ranges.
publicUrl should be set to the publicly reachable address for the widget public content. By default, Hookshot hosts this content on the
widgets listener under /widgetapi/v1/static.
branding allows you to change the strings used for various bits of widget UI. At the moment you can:
- Set
widgetTitleto change the title of the widget that is created.
openIdOverrides allows you to configure the correct federation endpoints for a given set of Matrix server names. This is useful if you are
testing/developing Hookshot in a local dev environment. Production environments should not use this configuration (as their Matrix server name
should be resolvable). The config takes a mapping of Matrix server name => base path for federation.
E.g. if your server name was my-local-server and your federation was readable via http://localhost/_matrix/federation,
you would put configure my-local-server: "http://localhost".
In addition to setting up the widgets config, you must bind a listener for the widgets resource in your listeners config.
listeners:
  - port: 5069
    bindAddress: 0.0.0.0
    resources:
      - widgets
See the setup page for more information on listeners.
API
The API for widgets is currently in flux due to being fairly new, and it's not recommended to develop against it at this time. At a future date this API will be merged with the existing provisioning API and the details will be published.
Service Bots
Hookshot supports additional bot users called "service bots" which handle a particular connection type (in addition to the default bot user which can handle any connection type). These bots can coexist in a room, each handling a different service.
Configuration
Service bots can be given a different localpart, display name, avatar, and command prefix.
They will only handle connections for the specified service, which can be one of:
feeds- Feedsfigma- Figmageneric- Webhooksgithub- GitHubgitlab- GitLabjira- Jiraopenproject- OpenProject
For example with this configuration:
serviceBots:
  - localpart: feeds
    displayname: Feeds
    avatar: "./assets/feeds_avatar.png"
    prefix: "!feeds"
    service: feeds
There will be a bot user @feeds:example.com which responds to commands prefixed with !feeds, and only handles feeds connections.
For the homeserver to allow hookshot control over users, they need to be added to the list of user namespaces in the registration.yml file provided to the homeserver.
In the example above, you would need to add these lines:
- regex: "@feeds:example.com" # Where example.com is your homeserver's domain
  exclusive: true